Monday, 29 April 2013

Diorama modelling and textures

Week 10&11
During week 10 and week 11 I was concentrated on modelling and texturing the diorama for my vehicle. First I started off with a military checkpoint design, but thing proofed difficult and with it I wasn't showing off my model, which is the main purpose of the diorama. 
So I started allover again and changed it to a more basic one. The result was much better that what I had before and you can see on the images below. 

Wednesday, 17 April 2013

Army vehicle Texture

Week 8&9
After unwrapping the UV's for the Hagglund and baking the high poly for it, all there was left to do was texture it.
For textures I used my own reference images and hand painted textures. First, what I did was to bake an AO for my mesh, however I had to bake the tracks and body separately, because if I had baked them as a whole I would get a nasty black seam on my wheels and tracks if I was to animate them. So I duplicated my mesh and separated the tracks from the main body. After that I left only one of each wheel and deleted all the others, because I didn't need them for the bake.


On the image above you can see what I used to bake my tracks. I used only this set of wheels, because all the others were duplicates and I didn't need to bake all of them. After that in Photoshop I combined the AO for the body and the tracks in to one AO sheet. I had to fix some issues I had, but what I did was to hand paint them by using the Clone tool in Photoshop.
After my Ambient occlusion was finished, I started making my diffuse for the mash. As I said before I used self- gathered reference and some hand painted textures.
First, I applied a base metal texture to almost every part of the mesh. Then over the body and the roof- top I set a hand painted texture resembling green paint. After that I wanted to add some detail to it, so I painted some dirt, thinking of on which part of it it would have dirt. Using the Lasso tool in Photoshop I hand painted some spots over the roof top.
Second, thing I did was to pain some spots over the body using the same technique just to give it a more military look. I added some layer effects inner shadow and drop shadow to make it look more interesting. I also applied a layer mask over them and copied on the mask textures with cracks and rust, just so it could fade them and give them a more worn look.
Third, I did the inside using pretty mush the same textures. I only added a lather texture for the seats and steering wheel. Another thing I did was to rework the hinges, because my normal map for them didn't work out very good, I decided to hand paint them. Using my UV's as a guide, I hand painted where I wanted the bolts and after that using the layer effect Bevel and emboss, stroke I got a pretty good result.
Finally, after I did all the textures for the tank, I wasn't happy with the final result, because it looked to new and considering it is a military vehicle I wanted it to have a more worn out and used look, so I applied a layer mask over the green paint using a scratched metal texture and the result was that it showed the base metal texture beneath it which was the result I was looking for. After that I applied a hue/saturation and Levels over the whole texture sheet and this is the result I got.


I then added my normal map for it using my high poly bakes for Maya and made a specular map, so it wasn't so shiny.

Wednesday, 3 April 2013

Army Vehicle- UV's & High Poly

Week 6&7
In this post I will show you how I did my UV unwrap and some High Poly backing.

After I finished modelling my model, it was time to start unwrapping my UV.

To do that, first I applied a checker box texture over my model, because that way I would be able to see where the texture is stretched. After that I selected all the faces on the part I want to UV and using Planer Mapping, I unwrap it and scale it down to the right size. The size of your UV depends on where it's facing. For example, on the image above, you can see how I have scaled the rooftop and the main body to have a higher resolution that the wheels, because it's a bigger surface and you would be able to see more details on it. I used the same technique for everything else. However, for the parts that were duplicated, I unwrapped the UV's for one, deleted the rest and duplicated the unwrapped part. I will as an example the wheels, because you can see it more clearly. By using this technique, I also save a lot of UV space, because all the UV's for the wheels are overlapped. The same is with the other duplicating parts.
   On the image above you can see, how my UV's are laid out. All the dark blue and purple UV's are duplicated. After I did that I took a UV snapshot, which I saved as a Targa file and uploaded in Photoshop, so I could start working on my texture.
If you want to make an Ambiet Occlusion bake of your model, you would need to clear out all the duplicating UV's and leave only one of them, because your AO bake will not work with duplicated UV's.

After I unwrapped the UV's for my model, what I did next was to make a high poly models of parts that I needed, so I could bake a Normal Map from them and get more details. 
  First, I did the high poly for the wheels. Modelling is pretty straight forward, only difference is that you don't need to worry yourself with poly limits. After I was finished with modelling of the wheel and baked the normal map for it using Transfer Maps, I wasn't very happy with it, because of the edges (you can see on the image above), so I when back into Maya and deleted some geometry and this was the result I got:
After that I baked the wheel again and this time it looked a lot better and smoother.
I did high poly models for the tracks, doors, panels, hinges, radiator, ect. 


 For all of them I used the same technique's and where I had problems with the cylinders after I baked them, I used the same solution as I did with the wheels.

Wednesday, 27 February 2013

Ground Based Vehicle Modelling Final

Week Five
Hey everyone, in this post I will show you what I did with my model and how the final looks came out.
So to pick up from where I left last time. Seeing that I have modelled the outside of my vehicle, it was time to start modelling the inside. First I started by modelling the doors on each side of the body and deleted the faces, so I could set up the doors in there place. After doing that and placing the door and the hinges where they needed to be, I combined both meshes, after which I centered the pivod in the middle of the hinges, so when I rotated the door could open. I did that, so I could use it in the future, if I wanted to animate it. After that I started modelling the interior, placing the seats, the steering wheel, pedals, shifting gear, etc. I also had to model the exhaust in the back of the vehicle. You can see it on the images below.


When I finished modelling the inside, I was afraid that I would have a problem with my polygon count, but to my fortune everything was good all I needed to do was a clean up faces which had more that 4- sides and the weren't many. Down below you can see the final result with the geometry applied. 


I forgot to mention that we needed to import the Unreal_Man into Maya, who is exactly 6 ft tall, so we could scale and model are vehicles in the proper size. Till next time. 

Ground Based Vehicle- Week Three

Week Three

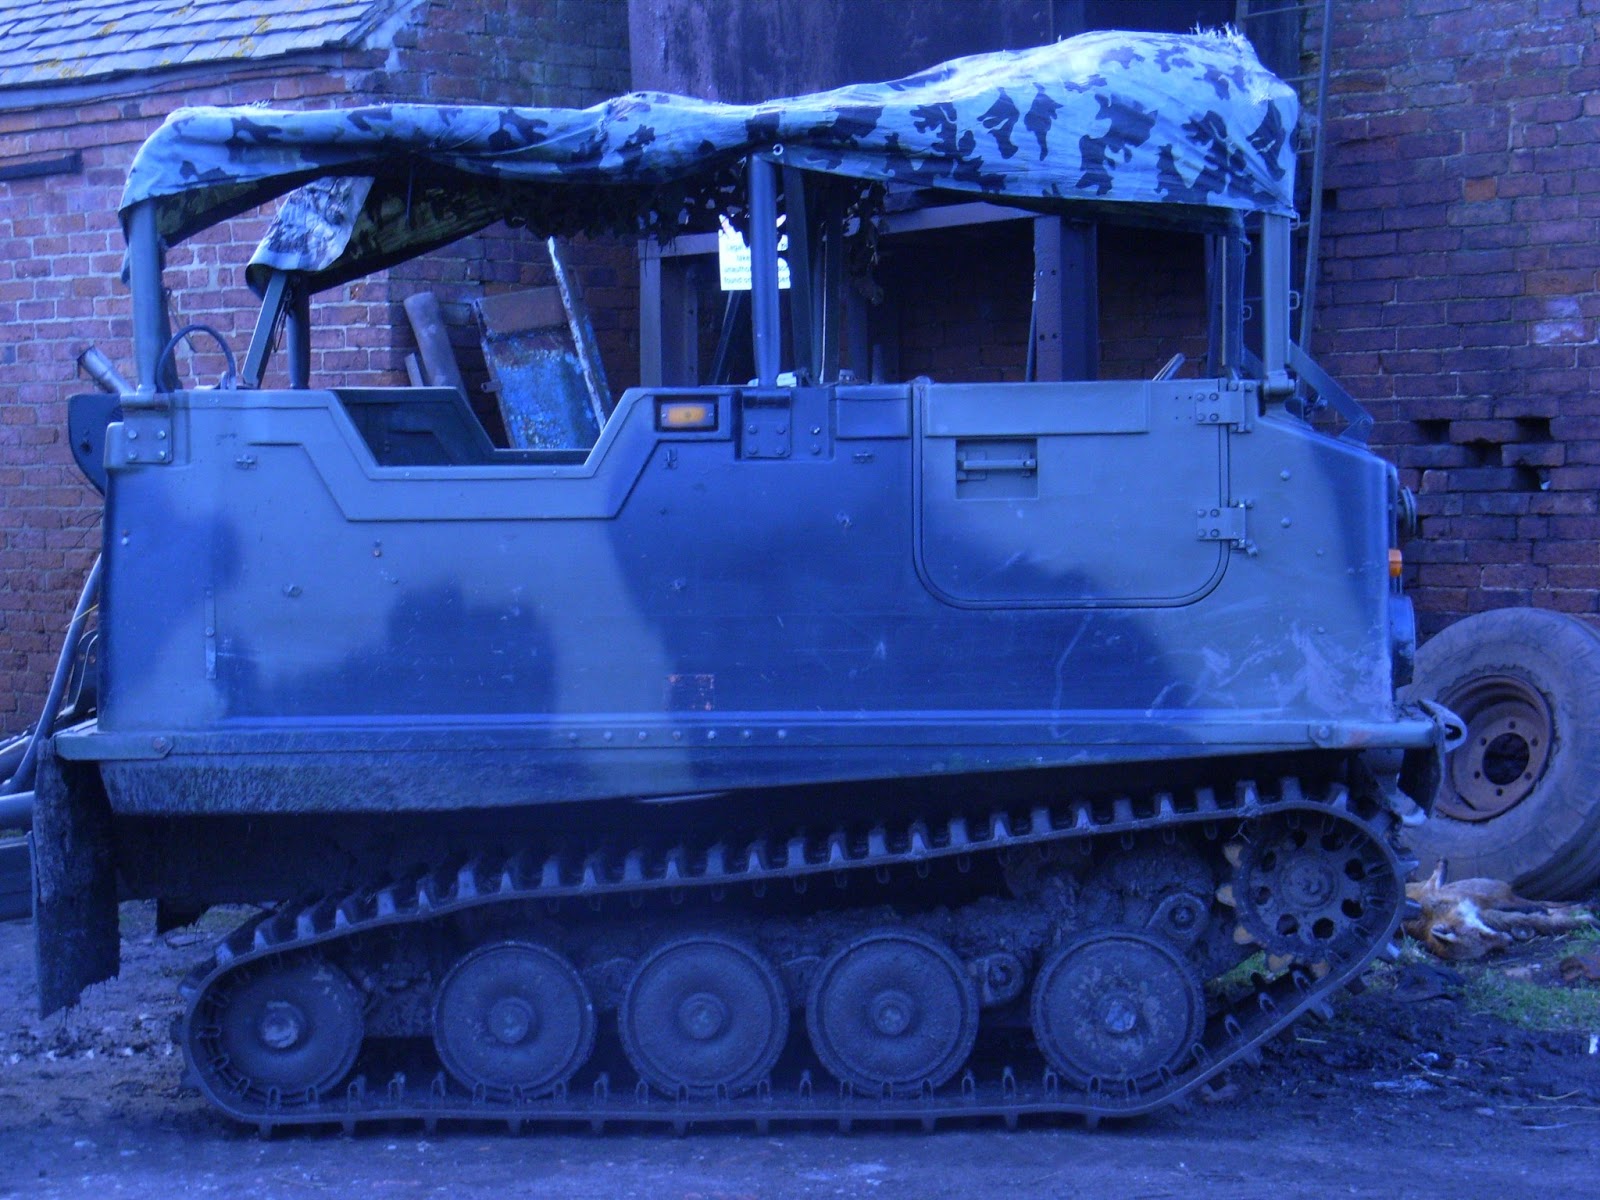
On week three we had to present all the images we have gather for marking and also to have made up our mind on what we will be modelling and of course to have started modelling. After going trough my images I decided to model the Bv206 Hagglund, which you can see below:
After sorting out which images I could use I started modelling, but I had a bit of a problem. I couldn't photograph the inside, so I asked my lecturer if I could use any images from my colleagues and he approved as long as it was from people who weren't doing the same thing. Afterwards I imported into Maya a side, front and back images of the Hagglund and I started modelling from them.
I decided to do my low poly mesh and when I was finished with it, I am planing to make some high poly modelling for the details, just bake them out and put them on to my low poly object.

On the images above you can see a basic block- out I did of the main body and on the second image with geometry. I did this by creating a cube and using the eage loop tool and extrude I created what you see on the image from the cube. After blocking out the body, I turned my attention the the tracks and the wheels.


  On the images above you can see the a basic block out the track. I created it by creating an rectangle, selecting on one face and using the extrude tool I extruded following my reference until I got the final result. After that I decided to model the details of the tracks, as you can see, but I encountered a problem with my polygon limit. If I was to model the hole track with the details on it and duplicate it for the second one, the my polygons went sky high, so I discarded that idea. However, the wheels were pretty simple, I created a cylinder on which I deleted the triangle faces and using the Interactive split tool I connected the vertex's to create 4- sided faces. After that I modeled how the wheels were connected  to the tracks and also to the main body. It was very difficult, because between the wheels there was a lot of mud and I couldn't see very good behind them, but in the end I managed.


Below is the image of what I had at the end of the third week in which I modeled the tracks and the body as a basic block out.


Tuesday, 26 February 2013

Ground Base vehicle- Week Four

Week Four
Hey guys, welcome back. On today's post we will pick up from where we left last time and I will show you some improvement's I did with my model and problems I had.


So here are some images of what I did I finished blocking out the body and the wheels. Basically I started modelling some basic shapes on the front of the Hagglund, where the headlights and the radiator are. However. I didn't model everything, because as you can see, I was already pressed with the polygon count reaching 5000 polygons which was a lot, considering I still had to model the inside. For modelling the details on the front, I used some basic shapes like the polygonal cube and the polygonal cylinder, which after that remodel using the edge loop tool, interactive split tool and just a heads up, use the interactive split tool only when needed be, because most of the time it can cause Maya to crash and if haven't saved it's going to be pretty nasty. Wet's get back to the point. After adding some geometry, scaling, extruding and bevelling the edges to get a more believable surface, I got the final result. Also I deleted the back faces, because the objects were interacting with the main body and you wouldn't be able to see the back, so I didn't needed them and that way I reduced my polycount.

Next thing I did, was the rooftop with the pipes and the covering. The covering I did by creating a plane shape and after that adding some edges with the edge loop tool, so I could distort it. When I got the shape I needed, using the bevel on the edge to give it a more realistic shape. After that I modelled the pipes on which the covering was attached. For the pipe which goes from the back of the vehicle to the front, I deleted bout bottom and top face's and after that while selecting the edge and extruding till I got what I wanted. The same principle was use for the other pipes.
 After I did the rooftop, I was scared, because my polycount was showing 6000 polygons and I needed to go in and started cleaning stuff like edge's, face's, vertex's which I didn't need. I haven't realized how many face's and edge's I had in the tracks, which I shouldn't be there, because you won't be able to see them anyway. So I went in and started deleting everything that wasn't needed and that is how I reduced my polygons to 4900, which was refreshing and I was happy with the result. On the image below you can actually see what I had in the end of week four.
P.S: Please, share and comment, so I could get an idea of what you thing. Thank you, see you next time guys.